Polished cast aluminum can look like chrome and still keep the strength and weight advantages of aluminum. Whether you’re cleaning up engine parts, furniture hardware, or die-cast housings straight from the foundry, the basic logic is always the same: clean → flatten → refine → protect.
This guide walks through those steps in detail, from DIY hand polishing to mass finishing for production parts, so you can decide whether to polish in-house or work with a supplier like Yongzhu Casting.
What Is Cast Aluminum and Why Is It Hard to Polish?
Cast aluminum parts (gravity casting, sand casting, or die casting) are usually more porous and textured than wrought aluminum. Typical surface conditions include:
- Visible parting lines from the mold
- Gate, runner, or ejector marks
- Small pits and porosity
- A matte or slightly rough texture from the mold or shot blasting
Compared with billet aluminum, you normally need more sanding and buffing steps to get a mirror finish on cast aluminum. A realistic target is often:
- Functional satin finish (Ra 1.6–3.2 μm) for industrial parts
- Decorative bright finish (Ra 0.4–0.8 μm) on visible areas
Trying to jump straight from a rough casting to polishing compound usually ends with “orange peel”, visible scratches, or a cloudy finish.


When Does It Make Sense to Polish Cast Aluminum?
Polishing costs time and labor, so it’s usually justified in these situations:
- Visible consumer-facing parts
Handles, trim, decorative brackets, housings, and furniture components where appearance sells the product. - Food, medical, or clean environments
Smoother surfaces trap less dirt and are easier to clean and disinfect. - Aerodynamics or fluid flow
Intake manifolds, pump housings, valve bodies: polishing can reduce turbulence and fouling. - Corrosion protection
A polished, sealed surface slows down oxidation and staining compared with raw cast aluminum.
For purely hidden structural parts, shot blasted or machined finishes are often enough; mirror polishing is rarely necessary.
Finish Levels and Typical Grit Roadmap
Before choosing tools, decide what “shiny” means for your project:
- Industrial satin: visible but not reflective
- Bright brushed: directional sheen, light reflection
- Near-mirror: you can see blurred reflections
- Mirror: clear reflections, like chrome
A practical grit roadmap for cast aluminum is:
- Rough cast, heavy defects: 80 → 120 → 240 → 400 → 600 → 800
- Lightly machined or bead-blasted: 240 → 400 → 600 → 800 → 1000
- Pre-polish: 1000 → 1500 → 2000 (optional for near-mirror)
- Buffing: cut compound → color compound → finishing compound
The goal is to remove the previous grit’s scratches completely before moving to the next finer step.
Tools and Materials for Polishing Cast Aluminum
You can polish by hand for small areas, or by machine for larger parts and production work.
Abrasives and Polishing Compounds
- Abrasive paper or discs
Aluminum-compatible sandpaper (80–2000 grit), flap wheels, or non-woven abrasive pads. - Cutting compound (first buff)
Harder bar compound (often brown or gray) for removing 400–600-grit sanding marks. - Coloring compound (second buff)
Medium compound (often green or white) that brightens the surface after the cut stage. - Finishing compound (optional)
Very fine compound or liquid polish for the final mirror gloss.
Tools
- Variable-speed angle grinder, die grinder, or rotary tool (with appropriate guards)
- Bench grinder with buffing wheels
- Drill with polishing attachments for small parts
- Microfiber cloths and lint-free rags
- For production: vibratory tumblers, barrel finishing machines, or automated polishing lines
Cleaning and Protection
- Heavy-duty degreaser or alkaline cleaner
- Solvent wipes (where allowed) to remove residual oils
- Metal sealant, wax, or thin ceramic coating to protect the final finish
Safety Equipment
Polishing creates dust, noise, and rotating hazards. Always use:
- Safety glasses or face shield
- Cut-resistant gloves (but not too loose)
- Dust mask or respirator if you create fine aluminum dust
- Hearing protection for power tools
- Apron or old clothing
Secure the part firmly before starting—loose parts can be dangerous.
Step-by-Step: How to Polish Cast Aluminum for a Shiny Finish
This step-by-step process is suitable for castings such as brackets, covers, housings, or trim pieces. For very large or very small parts, see the special sections later.
Step 1 – Clean and Degrease
- Wash the part with warm water and a degreaser; scrub off oil, grease, and dirt.
- Rinse thoroughly and dry with lint-free cloths or compressed air.
- Mark deep pits, casting defects, or areas that may need extra sanding.
If the part has heavy oxidation, use a non-acid aluminum cleaner, then rinse again.
Step 2 – Level the Surface (Grinding and Coarse Sanding)
Goal: remove casting flash, sharp edges, and deep scratches before fine sanding.
- Use a file, carbide burr, or grinding disc to knock down parting lines, gates, and obvious high spots.
- Switch to 80–120 grit abrasive to level the surface. Work in one direction.
- Move to 180–240 grit, sanding at 90° to the previous direction so you can see remaining scratches.
- For decorative areas, try not to round off sharp design features unless necessary.
Do not jump more than one or two grit steps at a time, or earlier scratches will remain visible.
Step 3 – Medium Sanding (Refining the Surface)
Now you’re removing the scratches created in Step 2.
Typical sequence for rough castings:
- 240 grit → 400 grit → 600 grit
For smoother starting surfaces, you can often begin at 240 or 320 and still reach 600 quickly.
Tips:
- Keep the abrasive moving to avoid low spots and waves.
- If the part heats up too much to touch, pause and let it cool.
- At each grit, sand until the previous, deeper scratches are fully gone.
Step 4 – Fine Sanding for Near-Mirror Finish
If you want a bright or mirror finish rather than a simple satin look:
- Continue with 800 → 1000 → 1500 → 2000 grit, especially on visible faces.
- Use water-lubricated sanding where possible to reduce clogging and give a more uniform scratch pattern.
- Inspect under a strong light. At 1500–2000 grit you should only see a very fine, even “haze” on the surface.
At this stage the part will already look slightly shiny.
Step 5 – First Buff (Cutting Stage)
Now you switch from abrasives to polishing compounds.
- Mount a firm cotton buffing wheel or sisal wheel on a bench grinder or handheld tool.
- Charge the wheel with cutting compound (usually a harder bar compound).
- Hold the part securely and lightly press it into the wheel, moving constantly to avoid grooves.
- Work in overlapping passes until the sanding haze disappears and the surface becomes uniformly bright.
Reapply compound frequently; a “dry” wheel polishes slowly and may burn the surface.
Step 6 – Second Buff (Coloring Stage)
- Change to a softer cotton wheel dedicated to coloring compound.
- Apply medium or fine compound and buff the same areas again, using light pressure.
- You should now see a clear, reflective shine—often enough for automotive or decorative use.
For the very highest gloss, you can add a third buff with ultra-fine compound or a liquid metal polish on a microfiber cloth.
Step 7 – Clean and Protect the Finish
- Wipe off remaining compound with clean microfiber cloths.
- Degrease lightly if needed, then dry completely.
- Apply a metal sealant, wax, or ceramic coating according to the product instructions.
In outdoor or high-humidity environments, sealing is critical; bare polished aluminum dulls quickly.


How to Polish Cast Aluminum Wheels and Large Parts
Wheels, large covers, or frames are harder to hold and often have complex geometry.
Practical tips:
- Use larger buffing wheels (150–200 mm) on a stationary machine where possible.
- Work in zones: inner barrel, spokes, outer lip—finish one zone before moving on.
- For deep pockets or spoke windows, use small cone buffs or flap wheels on a die grinder.
- Expect more time: a full set of wheels may require several hours of sanding and polishing.
If the wheels are already lacquered or painted, all coatings must be removed safely before polishing the bare aluminum.
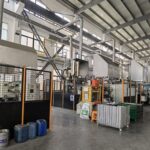
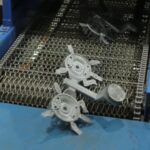
Mass Finishing Small Die Cast Aluminum Parts
For small die-cast parts—handles, knobs, housings—hand polishing each piece is not economical. In production, we often use:
- Vibratory tumbling with ceramic or plastic media for deburring and smoothing
- Dry polishing media (walnut shells, treated corn cob, or porcelain) for brightening
- Automatic belt or wheel polishing machines for high-volume parts with simple geometry
These methods can process hundreds or thousands of pieces per cycle. At Yongzhu Casting we usually:
- Deburr and pre-grind critical edges after casting.
- Run parts through one or more vibratory finishing stages.
- Perform selective manual or robotic polishing on visible faces if a mirror finish is required.
If you’re an OEM or buyer, it’s often more cost-effective to specify “polished finish” on the drawing and let the supplier build the right process.
Troubleshooting Common Polishing Problems
Even with the right grits and compounds, a few issues are common when polishing cast aluminum:
Cloudy or “Gray” Finish
Possible causes:
- Skipped grits in the sanding sequence
- Using a cutting compound only, with no color or finishing stage
- Dirty or contaminated buffing wheel
Fix:
- Step back one or two grits and re-sand; then repeat the full buffing sequence.
- Keep separate wheels for each compound and label them clearly.
Persistent Deep Scratches
Causes:
- Moving to finer grits before the deeper scratches were fully removed
- Hard particles trapped between the wheel and surface
Fix:
- Identify the deepest scratch and drop back to a coarse grit that can remove it (often 240 or 320).
- Clean the work area and wheels; never polish on a wheel that has picked up steel filings or debris.
Over-Rounded Edges or Washed-Out Details
Causes:
- Applying heavy pressure on edges during grinding or buffing
- Using very soft wheels on sharp features
Fix:
- Use firmer wheels and lighter pressure at edges; spend more time on flat areas instead.
- Mask delicate details if necessary, or polish them separately by hand.
Black Residue and Smearing
Causes:
- Excessive heat during buffing, which mixes aluminum and compound into a dark smear
- Too much compound on the wheel
Fix:
- Clean the surface with solvent, reduce pressure, and let the part cool between passes.
- Lightly dress the wheel or switch to a fresh one; use less compound.
How to Keep Polished Cast Aluminum Shiny
Even a perfect polish will fade if the part is left unprotected in a harsh environment.
Basic maintenance plan:
- Wash with mild soap and water; avoid aggressive alkaline cleaners.
- Rinse road salt or chemicals off as soon as possible.
- Re-apply wax or sealant every 3–6 months on outdoor parts.
- For interior decorative pieces, a quick hand polish once or twice a year is usually enough.
Avoid abrasive kitchen pads or aggressive scouring cleaners—they will scratch the surface and dull the shine.
FAQ: Common Questions About Polishing Cast Aluminum
Can you polish cast aluminum?
Yes. Cast aluminum can be polished to a bright or mirror finish, but it generally requires more sanding and buffing steps than extruded or billet aluminum because of its rougher starting texture and porosity.
Do I need to remove old paint or clear coat before polishing?
If the coating covers the areas you want to polish, it must be removed completely using appropriate chemical strippers or mechanical methods, then the bare aluminum is sanded and polished.
What grit should I start with?
For rough, as-cast surfaces start around 80–120 grit. For machined or bead-blasted parts, you can often begin at 240–320 grit. The rule is to use the coarsest grit that will remove defects in a reasonable time without leaving deep gouges.
Is mirror polishing always necessary?
Not always. Many industrial parts only need a satin or bright brushed finish for function and cleaning. Mirror polishing is mainly for decorative parts or premium products.
Can polishing weaken the part?
Proper polishing only removes a thin surface layer (typically tenths of a millimeter) and has little effect on strength. Aggressive grinding that removes material from critical sections can reduce safety and should be avoided.


When to Work With a Professional Polishing Partner
Hand polishing is suitable for prototypes, restorations, and very small batches. Once you need:
- Hundreds or thousands of identical parts
- Tight dimensional tolerances after polishing
- Consistent gloss level and appearance across batches
…it’s usually more economical to have the foundry and polishing done together.
At Yongzhu Casting, we can:
- Design aluminum die-cast parts with polishing in mind (radii, draft, wall thickness).
- Choose alloys that respond well to polishing and corrosion protection.
- Combine casting, CNC machining, and mass finishing to hit your target cost and appearance.
If you’re planning a new project and want polished cast aluminum parts with stable quality, you can send us your drawings and we’ll recommend a suitable finishing route.